Wednesday, May 30, 2007

Dreamweaver CS3 Bible is alive


I am delighted to announce that the Dreamweaver CS3 Bible is now available. I created a series of interactive tutorials to accompany the book created of course with Adobe Captivate. When I get some spare time, I will post some of the techniques I used to create these tutorials. But for now it is back to the grind stone.

Friday, April 20, 2007

Exporting Captions to MS Word

Today’s post focuses on one of the reasons why I have been so quiet recently At the tail end of 2006 I was asked if I would be prepared to create a series of getting started tutorials for Dreamweaver CS3. Due to the incredibly positive feedback I received month after month, from the original Dreamweaver 8 Getting Started series I created a couple of years ago, the only answer I could give was “Yes!”

Initially, I had hoped that I would be able to repurpose a lot of the content I had previously created. However, due to the significant changes Adobe has made to Dreamweaver in Dreamweaver CS 3 and also the fact that the original tutorials were created using table-based layouts – so 2005 baby! I end up having to create virtually all of the Captivate project files again from scratch.

For the most part, one of the project components that I did manage to salvage was the caption text. This bring me nicely to the topic I want concentrate on, in this post - Exporting project captions to MS Word.

For those unfamiliar with this feature you can export your text captions to MS Word by choosing File > Import / Export > Export Project captions and closed captions…

In general the main reason why you would want to export text captions to MS Word would be to localize (translate) your caption text into another language. This is why if you have ever used this feature and opened the resulting MS Word document you were presented with two columns one called Original Text Caption Data and the other Updated Text Caption Data.

If you are a regular visitor to this blog you’ll know that I am pretty passionate about the Captivate 2 feature set. I’ll be honest I love nothing more than being able to use, promote and talk about Captivate wherever I can. During the elearning technologies conference I spoke at back in January (2007) many delegates asked about how do localize there Captivate projects and I got a real buzz seeing the look on their faces when I explained that Captivate makes this just so simple but anyway I digress…

For this project I knew that although I would not be able to import the text captions from my existing project files into the new ones (Captivate does not allow you to do this) I had to create for Dreamweaver CS3. What I could do, was to use MS Word’s Find and Replace tool to change all references in the text captions from Dreamweaver 8 to Dreamweaver CS3. And also change the name of the sample web site from Café Townsend to Aquo Drink (the name of the new sample site for the new version of Dreamweaver.)

Having made all required changes I then had to simply copy the text from the MS Word document and paste this into each of the new text captions I inserted into my new project files.

Although this might not seem like a big deal, it did mean that I didn’t have to type all the text for each of the text and failure captions and it also gave me the satisfaction of knowing that nowhere in the Getting Started series (thanks to MS Word’s Find and Replace feature) were there going to be any references to the original sample site “Café Townsend”

Wednesday, April 18, 2007

Converting SWFs into a video format

Well, following the sign off my very large Captivate simulation projects (details to follow in the near future) I mentioned briefly back in February I’m finally back and excited to share some of stuff that has been happening over the last couple of months.

Today's post is all about a great new little application from Sothink.com called SWF to Video Converter. Using this powerful new application I am now able to convert Captivate content we create at work (WebAssist.com) into an AVI format. This is a very exciting development because it means that for the first time we can distribute / broadcast content on sites such as YouTube

I first came across the SWF Converter thanks to the Developer Center article Silke Fleischer wrote; Silke is a senior product marketing manager for Adobe Captivate. So naturally, being the inquisitive soul that I am, I naturally went and downloaded a copy of this software to put it through its paces and I have to say that I was very impressed. The wizard style user interface is very straight forward and what excited me the most was that this app could also record the audio from the current SWF file. I have to say that along with another very cool feature I’ll come to in a minute, this feature sold the SWF converter for me and I recommend that we should purchase this product. As whilst in the past I had experienced success in capturing Captivate screens using an AVI screen recording tool, capturing the audio at the same time had proved to be very problematic.

The other very cool thing about this application is that whilst you are playing and capturing your Flash (SWF) files using the Converter, you can still interact with your SWF file. This is made possible because the SWF Converter supports ActionScript which means that when you capture your SWF, the ActionScript can be played properly. So what benefit does this give you? Well, it means that using the SWF Converter you can capture all the steps from an interactive simulation (training or assessment in Adobe Captivate) and convert it into a video demonstration! You can view a small example of this by downloading this example file (2,112 KB) Sample Adobe Captivate interactive simulation converted into video format.

You also can see how we are now using the SWF Converter to market the Database Starter Kit on YouTube.com by clicking on the this link. Database Starter Kits on YouTube.com

Wednesday, February 14, 2007

A Quick Update

Things are pretty crazy here at the moment so posts are going to be far and few between for the next month or so. I want to apologize to any one who has recently posted comments that I have not replied to yet once things settled down I promise to get back to you all. Here are some of the things that have been going on.

  • Speaking at the UK Learning Technologies Conference and presenting live demos for Adobe UK
  • The launch of Project DB Cooper. DB Cooper is WebAssist's first commercial training package teaching Dreamweaver users (PHP and ASP) how to work with databases developed as interactive simulations. Learn more...
  • UK Internet Magazine .Net feature WebAssist's SecurityAssist solution recipe on their cover CD of the .net February Edition

Sunday, January 14, 2007

Project: DB Cooper

Having just got back from my holiday break, I’m straight into creating Captivate content. One of the really exciting projects I am currently working on for WebAssist is a project which goes under the code name of “DB Cooper”. Unlike many of the other work projects I worked on last year, DB Cooper is an interactive simulation. Whilst I cannot go into the specifics of this particular piece of work, I must say that it feels great to be creating simulations again. There is just something about interactive simulations that really resonates with me;in particular the fact the interactive simulations enable learners to “exercise their mental muscles". Oh and if like me you haven't heard of DB Cooper before then visit this web address.

Adobe Captivate 2 includes a variety of new tools that make creating interactive simulations much easier that in previous versions these include:

  1. The Advanced Interaction dialog box
  2. The ability to automatically add text entry boxes for text fields

The fact that Captivate 2 will automatically insert text entry boxes during “capture time” is a good feature; though I have to be honest and say that I always find that I need to adjust any text entry boxes Captivate adds; plus, the program does not always capture the characters I have typed (during capture) correctly so there is still so additional steps to perform but at least now you have a better starting point than before.

However, the most exciting features for interactive projects are the Advanced Interaction dialog box. Historically, trying to recall the various settings you have applied to your interactive objects was a right royal pain as you had to inspection these individually. What the Advanced Interactive dialog brings to the table is the ability to review (and if required print) all your interactive project information from one centralized location. You can filter the list by clicking on the button that corresponds to the object type you want to review; one of things about the filtering I find particularly useful is the ability to remove any hidden slides from the list.

If like me you are spending much of your working life using this program then anything that improves you workflow and cuts down the overall duration of your Captivate projects is always something we will welcome with open arms.

Tuesday, December 19, 2006

Working with multiple pages documents

Sometimes when working on a Captivate project you might find that you need to include additional information which would normally be best presented in a multiple page text document. Although it is possible create a link to say an MS Word document using the Open URL or File option of a slide or interactive object such as a click box there are many instances where this is not the result you or your client is looking for.

So is it possible to embed a regular text document into an Adobe Captivate 2 project file. Well, if you want this to be an MS Word document, then the answer is No! The same is also true if you want to embed a PDF file. However, if you own Flash Paper then you can actually embed a document into a Captivate file.

Although you can just insert a Flash Paper document into a Captivate project an as animation; the problem here is that in many case you will find that the Flash Paper doc will get automatically resized when you preview and or publish the your project. To get around this annoying little Flash Paper quirk, carry out these steps.

  1. Create a Captivate project with a single slide and insert the FlashPaper (FP) document as an animation so that it covers the entire slide
  2. Make sure that both in the animation dialog and also the Project Preferences all transitions are switched off and that the loading screen option (Project preferences) is also disabled.
  3. Publish the FP document as a SWF
  4. Open the project file you want to add the FP document (SWF) into
  5. Insert the published SWF file containing the FP doc as an animation
  6. With the Animation options dialog on screen set the transition effect to No transition.
  7. Publish your new Captivate project
View the sample file

In the example I have included in this post, I've hidden a button object behind the FlashPaper SWF file to ensure that the slide is paused. In order to advance to the next slide you would simply need to click the Forward button on the playback control.

Learn more about FlashPaper
FlashPaper Developer Articles - Part of the Adobe Contribute Developers Centre. You may need to scroll down to locate these articles.

Monday, December 18, 2006

Publishing to an Adobe Connect Server

If you are using an Adobe Connect server, you might need to download this hot fix file that addresses a problem of Adobe Captivate 2 only supporting HTTP references.Hot Fix for Adobe Connect Server users

Read the tech note: Adobe Captivate 2 content uploaded to Adobe Connect fails to playback.

Thursday, November 30, 2006

Extending Captivate Projects with Variables - Pt2

Today's post continues on the theme of working with Variables in Adobe Captivate but this time the sample file displays the current frame plus all of the SWF frames in the Captivate project and includes a go to frame feature.

Using Variables with Adobe Captivate 2

The following commands were used to create this file:
  • rdinfoCurrentFrame
  • rdinfoFrameCount
  • rdcmndGotoFrame

Download the Goto Frame sample file.

Friday, November 24, 2006

Macrofireball Logo

macrofireball logoToday sees the arrival of my new macrofireball logo. A number of people have asked me how the name "macrofireball" came about so here is why I choose that name.

macro - In memory of Macromedia Inc who first introduced me to Captivate. At the time the product was then still called RoboDemo and for those interested it was George Fox - Dev Center Editor for Dreamweaver who first told me about this incredible application.

fireball - because of the way Captivate was taken my career to a new level and given me opportunity to work on projects I could of only dreamed of.

ball - cos' it is round.

Tuesday, November 21, 2006

Extending Captivate Projects with Variables - Pt1

Working for a company that develops software which integrates with Adobe software such as Dreamweaver, Adobe Connect and Contribute certainly made me wonder if there was any way of extending Adobe Captivate. Whilst Captivate does not include the ability install new components into the application the same way that you can with other Adobe products there are still ways using ActionScript code to communicate with Adobe Captivate and thus additional functionality. You can learn more about these in the Adobe Captivate 2 User Guide on pages 147 through to 148.

Before I go any further I would like to pause and offer my deepest thanks to my good friend Gaurav Satija who has kindly steered me through the murky waters of ActionScript. Gaurav your a pal!

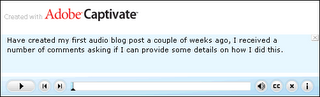
To demonstrate this, let’s start with something very simple. Each of the Playback controls you add to your Captivate projects include an information box, not a lot of Captivate users tend to use and from what I gather even fewer end users ever bother to click on the Info button.

However, this still is a useful feature. This is especially true if you are creating section 508-compliant projects since project information such as the description can be read by a screen reader such as JAWs for Windows. Just as an aside the description is also useful if you are publishing to an Adobe Connect Server since content of this field is also used as your project summary.

To accomplish this all you would have to do is create a new Flash file with a small amount of ActionScript code that includes the following:
rdcmndInfo == 0 rdcmndInfo = 1

In plain English this means that if the Info box has an equality value of 0 or in other word is closed then set its value to 1 and open it.

You can see this in action by clicking on the graphic shown below

Ok, well that is all well and good, but now let’s move onto some a little more exciting.

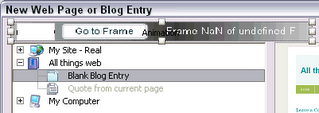
For example let’s say that whilst testing your Captivate projects you would like to display the current slide, the total number of slides in your project and a previous and next button to boot. Well, using the following four commands you can:

  • rdcmndPrevious – Go to Previous Slide
  • rdcmndNextSlide – Go to Next Slide
  • rdinfoCurrentSlide - Slide currently playing
  • rdinfoSlideCount – Number of slides in the project

To see this in action please click on the image shown below.

Now, if you are reading this and thinking well this is all well and good but I don’t know ActionScript code and I have no desire to learn either, well the good news is that for the most part you won’t have to. Adobe Community Expert Paul Dewhurst. has already created a ton of Captivate widgets that you can just download and then insert as animation objects into your Captivate projects. Many of these have been around since Captivate 1 but Paul has already started creating some new widgets that take advantage of the new features available in Captivate 2 including one widget that automatically opens closed captions. Something I will be using in my future audio blog posts.

Feel free to use this SWF file in your own projects. Simply download it. Insert it as an animation in your Captivate project and set it's display to Rest of slide.

Monday, November 20, 2006

Training Simulation Project

I'm still crafting out my next big posting so in the meantime here is a link to one of the big interactive simulation projects I worked on last year for Adobe (at the time Macromedia Inc)

Getting Started with Dreamweaver 8

All comments welcome.

Tuesday, November 14, 2006

Macrofireball's Captivate Articles

The blog post that I was hoping to share today is going to need some more work, so in the meantime here is a list of the Captivate articles I have written over the last 18 months.

Adobe Captivate 2

Captivate 1

Tuesday, October 31, 2006

Creating Audio blog posts with Adobe Captivate 2


Following a number of requests todays post outlines how to create an audio blog post using Adobe Captivate 2.

Sunday, October 29, 2006

On Tour with Adobe UK

I’ve just finished the first leg of the Adobe Acrobat 8 Tour where I had the privilege of introducing attendees to Adobe Captivate 2 and demonstrate how Captivate fits in the Adobe Connect family. This first leg of the tour took place in London in Regents Park. As you can probably tell from my previous blog posts I love talking about Captivate and it is always a joy when I have the opportunity to introduce new users to the program; not to mention showing existing Captivate developers some of the many new features that Adobe have introduced in Captivate 2 not to mention showing how Captivate 2 can be integrated into the Adobe Connect (formerly Macromedia Breeze) workflow.

The next leg of the tour takes me to Leeds on November 9 followed by Manchester 28 November so for those who are registered for those dates I look forward to seeing you there.

Without this sounding like the award ceremony at the Oscars I do want to take this opportunity to also thank all those who attended my sessions in Regents Park and to Adobe UK for making me feel so welcome. I look forward to catching up with you again later this month.

Tuesday, October 17, 2006

An Adobe Captivate 2 Audio Blog Post.

In the second my blog posts today. I demonstrate how Adobe Captive 2 can be used to podcast. The possibilites here are endless and as somebody who spends a considerable time narrating you can expect to see alot of these sorts of posts in the near future.
Adobe Captivate 2 Audio Blog Post
Click on the graphic to launch the Adobe Captivate file.

Monday, October 16, 2006

Text Area boxes in Adobe Captivate project files, surely not!

Last weeks lack of posts were primarily due a project on teaching WebAssist users how they can customizing pure CSS layouts generated using SiteAssist 3.0. In a couple of the segments of this tutorial series I really wanted learners to have the opportunity to grab the customized CSS code that we had used to customize the web page layouts but how to do that in Adobe Captivate? Well the simple answer is that in Adobe Captivate alone you just cannot do it the solution was create these in Flash 8 using the Text Area component and add them to my project file.

This is something that I had experimented with in Captivate 1.0 and although I could insert the published text area component (SWF) as an animation when I tried and preview the text area just would not show. Publishing didn’t help that much either. In a published file although the text in the text area box was there, the learner couldn’t see it and asking them to select what appeared to be invisible text and pasting this into a text file just didn’t sit right with me.

In Adobe Captivate 2, the text area component is handled much better, the text area and the text is rendered correctly either when you preview and publish as a SWF or you publish to Adobe Connect Professional.

One thing that you have to bear in mind is that when you publish locally you must include the published text area SWF. Internally I believe that Captivate references the published component the same way the program does with Flash video files. Something I found out when I sent my test Captivate 2 file to my colleague and good friend Joseph Lowery, only to find that Joe could not see the text area / code box I had inserted into my Captivate project file.

Below are two sample files that show this technique in practice. Although the ActionScript code included in the sample Flash file works, I have since found a better way to handle CSS in Flash, which I will make available once I have had the chance to do some more testing.

Friday, October 06, 2006

Using the Library in Adobe Captivate 2

Want to find out all about the new Library panel in Adobe Captivate 2, then read my latest Captivate article now available at the Captivate Developer Center.


More Captivate 2 posts coming soon

Wednesday, September 27, 2006

Adobe Captivate 2 in anger

No this isn’t a rant about problems with Adobe Captivate 2, far from it. I have just finished creating my first real-world project, the WebAssist.com solution recipe PayPal Websites Payments Pro. Using any piece of software on a real project (opposed to testing the software during the development cycle) can be a daunting experience. Does the software live up to it’s expectations? Do the new features really improve the user’s workflow and most importantly when used under normal working conditions does the application remain stable?

Well, in the case of Adobe Captivate 2 I am happy to say that this project the program performed really well. I am still amazed at how quickly Captivate 2 saves project files, even those that during development consisted of over 140 slides still saved in a fraction of the time they used to in Captivate 1 and, as for the new Library feature – well you’re going to have to wait a little while longer before I talk about that one.

Wednesday, September 20, 2006

Transparent Text Captions

Today’s Adobe Captivate 2 feature is transparent text captions. Transparent text captions, I hear you say! What possibly could be so exciting about these? Well in Adobe Captivate 2 if you need to create a transparent text caption and you want your text color to be say white, the Text Captions dialog box temporarily fills the background with a color so that you can see what you are typing! How much do I love this feature? More than words can say!

Transparent Text Captions

Tuesday, September 19, 2006

Preview Next X Slides

Project Preferences

Today’s Adobe Captivate 2 feature focuses on Previewing. When working on a project there as many instances when you only want to preview a certain amount of slides; although with Captivate 1.x you could preview the next five slides, there were many occasions when this simply wasn’t enough.

To address this issue in Adobe Captivate 2 you the user can now specify how many next slides the program should preview.

Another option in this dialog, is the ability to specify the default duration for newly created blank, image and question slides.