John Nack, Product Manager for Adobe Photoshop has very kindly blogged about the WebAssist CSS Designer Starter Kit for Photshop. You can read what John had to say on his blog.
Although this was the last project I worked on in Adobe Captivate 3, we did recently updated this interactive training package to include some detailed information on helping learners visualize the box model so I did manage to add some advanced actions, including an image toggle button, which I will blog about another time.
Wednesday, April 29, 2009
Tuesday, April 28, 2009
CSS Menus Starter Kit
Today sees the launch of the latest Adobe Captivate project I have been working on for my employer WebAssist The CSS Menus Starter Kit for Photshop. This was the first project I worked on in Adobe Captivate 4 so it was great to be able to take advantage of some of the new functionality version 4 has to offer including being able to take advantage of the Adobe Captivate 4 Aggregator.
The Adobe Captivate 4 Aggregator enables you (finally) to combine published files (SWFs)and includes a table of content plus other features such as "self paced learning" and a really nifty Search option. I have to be honest and say that at one point I didn't think that we were going to be able to use the Aggregator.
You see by default in Firefox when you load the published Aggregator (SWF)it loads and plays the audio (my voice over) from each of your published tutorials (SWFs)which as one of my colleagues pointed out:
"What a lovely cacaphony of Fletchers! A veritable flight of Fletchers, if you will. The new Aggregator certainly is making quite the impression"
Thankfully we managed to address this issue by disabling the Auto Play option, which can be found in the Start and End category of the Project preferences. Though you have to do this for every single project file - which did prove to be a bit of a pain. Also bear in mind that once you do disable the Auto Play option when you publish you then just get a Play button appearing in the center of the screen.
However, the good news is that you can add your own background image. Below is the screen shot of the background image we are using in this and all future starter kits.
Oh, just one final point, the style of the Play button you have seen in this blog post is determined by the style of skin you choose for your Playback Control.
You can learn more about the CSS Menus Starter kit available for both Photoshop and Fireworks then please visit this web addresses.
CSS Menus Starter Kit for Photoshop
CSS Menus Starter Kit for Fireworks
The Adobe Captivate 4 Aggregator enables you (finally) to combine published files (SWFs)and includes a table of content plus other features such as "self paced learning" and a really nifty Search option. I have to be honest and say that at one point I didn't think that we were going to be able to use the Aggregator.
You see by default in Firefox when you load the published Aggregator (SWF)it loads and plays the audio (my voice over) from each of your published tutorials (SWFs)which as one of my colleagues pointed out:
"What a lovely cacaphony of Fletchers! A veritable flight of Fletchers, if you will. The new Aggregator certainly is making quite the impression"
Thankfully we managed to address this issue by disabling the Auto Play option, which can be found in the Start and End category of the Project preferences. Though you have to do this for every single project file - which did prove to be a bit of a pain. Also bear in mind that once you do disable the Auto Play option when you publish you then just get a Play button appearing in the center of the screen.

However, the good news is that you can add your own background image. Below is the screen shot of the background image we are using in this and all future starter kits.

Oh, just one final point, the style of the Play button you have seen in this blog post is determined by the style of skin you choose for your Playback Control.
You can learn more about the CSS Menus Starter kit available for both Photoshop and Fireworks then please visit this web addresses.
CSS Menus Starter Kit for Photoshop
CSS Menus Starter Kit for Fireworks
VTC Hat Tip
I used to work at VTC and had the pleasure of creating quite a few Dreamweaver instructional videos. I left VTC in 2006 to meet new challenges and broaden my horizons at Web Assist and again like at VTC I work in a great friendly environment filled with talented individuals who have a real passion for what they are doing.
Since leaving VTC they have continued to create intuitive titles and the latest Dreamweaver CS4 training video is worthy of a mention. The videos are created with the beginner to Dreamweaver CS4 in mind or anyone upgrading to CS4 from a prior release. Feature by feature Dreamweaver CS4 is the most significant release of the program since Adobe acquired Macromedia. The real beauty of these training videos is that they are split up by subject, so for those of us who already have a some background with Dreamweaver (or design in general) it’s easy to skip the introductory stuff and get right to the new features and upper level techniques.
Beginners Dreamweaver CS4 Tutorial Video
Tuesday, January 20, 2009
Adobe announces Adobe Captivate 4 and the eLearning Suite
Today sees the launch of both Adobe Captivate 4 and the eLearning Suite. As Training Manager for WebAssist I need a tool box that enables me to deliver rich and engaging eLearning experiences whether you want to deploy your eLearning content to the web, desktop, mobile device or an LMS the Adobe eLearning Suite is right on the money.
Here is what is included in the Suite
Here is what is included in the Suite
- Adobe Captivate 4
- Adobe Flash CS Professional with Learning Interactions
- Adobe Dreamweaver CS with CourseBuilder Extension
- Adobe Photoshop CS4 Extended
- Adobe Acrobat 9 Pro
- Adobe Presenter 7
- Adobe Soundbooth CS4
- Adobe Bridge CS4
- Adobe Device Central CS4
- SCORM Packager
Friday, October 05, 2007
Podcasting and Edit Timing
During my recent tour with Adobe UK demonstrating Adobe Captivate and Adobe Acrobat Connect Professional, I was asked whether I ever used the Captivate audio feature Edit Timing. Well I have to be honest and say that until now this one of those features that I have hardly used. However, like many Captivate users I am always looking for ways to cut down on my workload and any opportunity I get to re-purpose content I welcome with open arms. Which brings me nicely to the topic of podcasting.
As recently appointed training manager for WebAssist I'm always on the look out for new and creative ways to offer informal learning to our users; and one way of doing this is to use podcasting.
Now when it came to creating the podcasts I naturally turned to Adobe Captivate and looked for a way to take the voice-over from the existing feature tours (demonstrations) and use this in my podcasts.
Now if you are sitting there thinking well surely that is simple enough, you just export the audio you recording when you first captured your screen action! Then let me explain how I create my voice-over.
Firstly, I don't use Adobe Captivate, whilst the recording and editing tools present in the applications are fine for many users; they just don't offer the power that I need. Instead I use Sony Sound Forge to record and edit my voice-over. Oh and in case you are wondering I don't use a headset either. I currently use a Sure SM 58 microphone - yes I am one of those Captivate users. Once I have recorded my audio I then import this on to each of the appropriate slides.
Anyway back to podcasting. So here I am with maybe 30 audio files scattered through my entire project. So how do I get them all back into one single file? The answer is to use Captivates Edit Timing audio feature.
Here are the steps....
The final task is to export the audio. To do this:
As recently appointed training manager for WebAssist I'm always on the look out for new and creative ways to offer informal learning to our users; and one way of doing this is to use podcasting.
Now when it came to creating the podcasts I naturally turned to Adobe Captivate and looked for a way to take the voice-over from the existing feature tours (demonstrations) and use this in my podcasts.
Now if you are sitting there thinking well surely that is simple enough, you just export the audio you recording when you first captured your screen action! Then let me explain how I create my voice-over.
Firstly, I don't use Adobe Captivate, whilst the recording and editing tools present in the applications are fine for many users; they just don't offer the power that I need. Instead I use Sony Sound Forge to record and edit my voice-over. Oh and in case you are wondering I don't use a headset either. I currently use a Sure SM 58 microphone - yes I am one of those Captivate users. Once I have recorded my audio I then import this on to each of the appropriate slides.
Anyway back to podcasting. So here I am with maybe 30 audio files scattered through my entire project. So how do I get them all back into one single file? The answer is to use Captivates Edit Timing audio feature.
Here are the steps....
- Start by opening the Adobe Captivate project file you wish to extract the audio from
- Insert a new blank slide (Shift + Ctrl + J)
- Move the new slide to the very start of your project.
- Double-click on the slide background and set the duration to say 120 secs
Note: If you don't set the duration to a high value you won't be able to move all the audio segments to just a single slide. - Choose Edit > Edit Timing > Project
- Select the first of the slide markers and drag it to the first slide - your new blank slide.
- Now do the same for the rest of the slide markers
Note: If you find that you cannot move a marker, go back to the blank slide and extend its duration. - Once all the markers are all located on the first slide click OK.
The final task is to export the audio. To do this:
- Choose Audio > Advanced Audio...
- In the Advanced Audio dialog box select slide that has the audio
- Select the option - Include MP3 files in export
- Click Export
- Click OK
- Specify where the audio file should be created
Thursday, October 04, 2007
WebAssist Success Story
Earlier this year Adobe Systems Inc wrote a success story based upon the tremendous impact Adobe Captivate has had upon our business. This study is also featured in the e-Learning Guilds new ebook "The eLearning Guild's Handbook of e-Learning Strategy."
Monday, July 23, 2007
Announcing Adobe Captivate 3
The wait is over, Adobe have today announced the latest version of Captivate, Adobe Captivate 3. Over the next few weeks I will be blogging about many of the new cool features (and some extra little bits) but for now here is the list of new features:
- Multiple recording modes
- Automatic rerecording of web applications (MS IE 6 only)
- Random Quizzing and Question Pooling
- Cut, copy and paste slides
- New Questions Slides
- Hot-spot
- Sequence
- Zooming in and out in Branching view
- Slide groups
- Answer Shuffle
- Rollover Slidelets
- New Slides transitions
- Microsoft PowerPoint Import - Now Adobe Captivate can convert PowerPoint slides into SWF files whilst retaining the animation effects
- XML file export and import for easy localization
- Preview project while recording audio
- Find and Replace
Thursday, July 05, 2007
Adding XML data in Adobe Captivate Projects
I am always looking for ways that I can extend my Adobe Captivate projects but not only so that I can include cool features but also to save myself some time. One of the time saving features I have been looking at recently is integrating XML (Extensible Markup Language) into my project files. Let me start by painting my requirements picture. WebAssist had a number of product suites (Super Suite, Web Developer Suite and Web Designer Suite) that were on special offer, now imagine that I had created a product feature tour that describes each of the suites and I want to include the offer price for each of the product suites.
View the Adding XML Data into Adobe Captivate projects sample.
Whilst I could just add the prices using transparent text captions what would be a lot more efficient would be to store the prices somewhere else so that once the special offer has ended I can adjust the prices without having to republish my Adobe Captivate project file. XML is an idea format for storing the suite prices but, since you cannot link XML data directly into Adobe Captivate you have do have to be prepared to spend a little time in Adobe Flash the end results are worth the extra effort.
The first step is to create the XML document which is something that you can very easily do in Adobe Dreamweaver CS3 or even Notepad if you don’t to use an HTML Editor.
<?xml version="1.0" encoding= "UTF-8" ?>
<!-- xml document created by Mark Fletcher -->
<products>
<product product_name="Super Suite" price="449.99"></product>
<product product_name="Web Developer Suite" price="249.99"></product>
<product product_name="Web Designer Suite" price="149.99"></product>
</products>
The next step was to fire up Adobe Flash and insert all the graphics and insert the graphics I wanted to include in the document. In this case I inserted the WebAssist logo and suite box shots.
Because I wanted to load text from a file instead of adding just static text, I inserted some text boxes and then using the Properties inspector text type drop down menu I selected Dynamic Text and gave each of the text fields a title.
Now for the ActionScript code which is used to display the data. I should point out that there are other ways of working with XML in Flash which I might come back to at some point in the future, but, for now here my AS logic.
// create an XML object called "my_xml"
my_xml = new XML();
// load data from an external XML file into "my_xml" object
my_xml.load("wa_offers.xml");
// When the data has been loaded... Call a function ("my_function" in this case)
my_xml.onLoad = my_function;
// ignore "white spaces", text nodes that only contain white space are discarded
my_xml.ignoreWhite = 1;
// function contents
function my_function() {
// take the data from the XML lines (line 0,1,2) and place that data inside text fields
text_field_1.text = my_xml.firstChild.childNodes[0].attributes.product_name;
text_field_2.text = my_xml.firstChild.childNodes[1].attributes.product_name;
text_field_3.text = my_xml.firstChild.childNodes[2].attributes.product_name;
//
text_field_a.text = my_xml.firstChild.childNodes[0].attributes.price;
text_field_b.text = my_xml.firstChild.childNodes[1].attributes.price;
text_field_c.text = my_xml.firstChild.childNodes[2].attributes.price;
Having tested the ActionScript code actually works, I then published the Flash document and turned my attention to Adobe Captivate
To add the published Flash file, I simply inserted the exported SWF file as an animation
At first when I did this I honestly thought that this wasn't going to work since in Captivate the XML data is represented as "undefined" both in Edit view but more alarmingly when I previewed.However, I decided to press on and see what would happen once I have published the Captivate file.
In order to get XML to work correctly I did find that I had to publish the project using Flash version 8 but once I had done this and made sure that my XML file (wa_offer.xml) was in the same folder as my published Flash files the data did show through correctly.
I have included the sample files below in case you want to experiment with this
Published SWF files and XML
Sample Flash File with ActionScript code
Sunday, June 24, 2007
Disposable or re-usable content
In a traditional e-learning environment the general consensus is that when creating learning content you should ensure that your e-learning objects are reusable. However, with rapid training tools such as Adobe Captivate is this still valid?
According to William Ward the keynote speaker on the Adobe e-learning tour I have just finished; in many situations the cost of creating new content is so low that you can just throw the outdated content away and start again and in many cases William (Billy to his friends) is absolutely right!
This is something that I have done many times with the Captivate content I have created. In many cases amount of time and the cost of trying to integrate new content into existing projects just isn't worth it. This is especially true when the narrative needs to be recreated from scratch as trying to ensure the tone and the color of voice-over is exactly the same just isn't worth the time and effort involved.
Yet there are also many instances when, Adobe Captivates flexible work flow has enabled me to literally drop a few new images and voice-over into an existing project and save myself a ton of work.
For example, last week as part of a marketing campaign I had to update an existing product feature tour. In total these updates took no more than approximately 45minutes whereas, creating the project again from scratch would have probably taken me a whole day and this is what I probably love the most about Adobe Captivate. As you may have heard me state before, because Adobe Captivate is so flexible, I can mold my content around my work flow rather than being forced down a single path.
The upshot of this is that whether you always ensure your e-learning content is reusable or you because of a short product life cycle you are happy to throw existing content away and start again from scratch with a rapid e-learning tool such as Adobe Captivate it really doesn't matter.
So over you to. Wherever possible when creating your Adobe Captivate projects do you re-purpose existing content or do you always start with a blank canvas?
Tuesday, June 12, 2007
Announcing Nutshell

Last week the company I work for (WebAssist.com) announced the release of Nutshell - Enhanced Reporting for Adobe Acrobat Connect Professional.
So why I am talking about this in a blog that is supposed to be dedicated to Adobe Captivate and e-learning? Well, because Adobe Captivate works seamlessly with Adobe Acrobat Connect Professional. Integrate Adobe Acrobat Connect Professional with Adobe Captivate and you can track your learner's progress and ensure they meet their learning objectives and what Nutshell does is offer multi-tiered reporting on all Adobe Acrobat Connect Professional trainings as well as meetings and events. With Nutshell you can not only generate reports on your Acrobat Connect activity you can also do the same for all groups, departments or your entire organization!
Want to learn more about Nutshell? View the feature tours I created for this new product, which of course were created in Adobe Captivate!
Friday, June 01, 2007
Upgrading from Captivate 1 to Adobe Captivate 2: Fudging Text Entry Boxes:
Today I am going to share some of my experience of working with Text Entry Boxes when upgrading from Adobe Captivate 1 to Adobe Captivate 2.
Back in Adobe Captivate 1 WebAssist (the company I now work for) asked me if I would create a series of interactive simulations for an eCommerce extension to Dreamweaver – eCart. This was a very detailed project and involved me creating over 60 interactive project files, many of which included TEBs (Text Entry boxes.)
Recently due a number of corporate branding updates I had to upgrade the original Captivate project files from Adobe Captivate version 1 to version 2.
Naturally I started the lengthy process of testing the upgraded files to make sure that during the conversion process no issues had been introduced.
Imagine my horror when I found that any text I inserted into the Text Entry boxes (during preview / run-time) was rendered at a different font size in Adobe Captivate 2.
Here is the reason why this happens.
After upgrading a Captivate 1 project to Adobe Captivate 2, font in text entry boxes appears large in Adobe Captivate 2. This is because of a bug in Captivate 1 and Flash Player. The font used while editing and publishing the SWF file was not the same as the original font. This bug has been fixed in Adobe Captivate 2. However, Captivate 1 projects will continue to have large font in Text Entry Boxes when the projects are upgraded to Adobe Captivate 2.
The Adobe Captivate team offers two workarounds to address this issue.- After upgrading a Captivate 1 project to Adobe Captivate 2, open the upgraded project.
- Edit the font in a text entry box.
- Use the Apply all option to apply the change to all text entry boxes in the project.
Now in theory this all sounds fine and certainly much easier that the second workaround which I will introduce in a moment.
The problem is that whilst you can change the font size in the TEBs in many cases when testing the TEBs at run-time having entered the correct text and moved to the next slide or whatever On Success action you have specified the text on the next slide of the project jumps slightly.Now when you’re working with a single project file that has maybe one or two TEBs repositioning the Text Entry boxes isn’t a huge deal; especially since you can use the Advanced Interaction dialog box to locate all these controls. However, when you are working with multiple files all of which have many TEBs then this approach is simply a non-starter.
The second workaround might be a lot more complicated but at least it saves you from having to manually reposition your TEBs.
Here are the steps:
- Upgrade all the Captivate 1 projects to Adobe Captivate 2.
- From the Start menu, click Run, type REGEDIT, and click OK. The Registry editor appears.
- Browse to HKEY_LOCAL_MACHINE > SOFTWARE > Adobe > Adobe Captivate > 2 > FudgeFactor.
- Change the value of the FudgeFactor key to 1. The default value of the key is 1.4.
- Close the Registry editor. The changes are applied after you restart Adobe Captivate.
- Preview or publish the Adobe Captivate 2 projects.
What I do is create a folder on my Windows desktop and Label this “Fudge Factor is set to 1”
Wednesday, May 30, 2007
Dreamweaver CS3 Bible is alive

I am delighted to announce that the Dreamweaver CS3 Bible is now available. I created a series of interactive tutorials to accompany the book created of course with Adobe Captivate. When I get some spare time, I will post some of the techniques I used to create these tutorials. But for now it is back to the grind stone.
Friday, April 20, 2007
Exporting Captions to MS Word
Today’s post focuses on one of the reasons why I have been so quiet recently At the tail end of 2006 I was asked if I would be prepared to create a series of getting started tutorials for Dreamweaver CS3. Due to the incredibly positive feedback I received month after month, from the original Dreamweaver 8 Getting Started series I created a couple of years ago, the only answer I could give was “Yes!”
Initially, I had hoped that I would be able to repurpose a lot of the content I had previously created. However, due to the significant changes Adobe has made to Dreamweaver in Dreamweaver CS 3 and also the fact that the original tutorials were created using table-based layouts – so 2005 baby! I end up having to create virtually all of the Captivate project files again from scratch.
For the most part, one of the project components that I did manage to salvage was the caption text. This bring me nicely to the topic I want concentrate on, in this post - Exporting project captions to MS Word.
For those unfamiliar with this feature you can export your text captions to MS Word by choosing File > Import / Export > Export Project captions and closed captions…
In general the main reason why you would want to export text captions to MS Word would be to localize (translate) your caption text into another language. This is why if you have ever used this feature and opened the resulting MS Word document you were presented with two columns one called Original Text Caption Data and the other Updated Text Caption Data.
If you are a regular visitor to this blog you’ll know that I am pretty passionate about the Captivate 2 feature set. I’ll be honest I love nothing more than being able to use, promote and talk about Captivate wherever I can. During the elearning technologies conference I spoke at back in January (2007) many delegates asked about how do localize there Captivate projects and I got a real buzz seeing the look on their faces when I explained that Captivate makes this just so simple but anyway I digress…
For this project I knew that although I would not be able to import the text captions from my existing project files into the new ones (Captivate does not allow you to do this) I had to create for Dreamweaver CS3. What I could do, was to use MS Word’s Find and Replace tool to change all references in the text captions from Dreamweaver 8 to Dreamweaver CS3. And also change the name of the sample web site from Café Townsend to Aquo Drink (the name of the new sample site for the new version of Dreamweaver.)
Having made all required changes I then had to simply copy the text from the MS Word document and paste this into each of the new text captions I inserted into my new project files.
Although this might not seem like a big deal, it did mean that I didn’t have to type all the text for each of the text and failure captions and it also gave me the satisfaction of knowing that nowhere in the Getting Started series (thanks to MS Word’s Find and Replace feature) were there going to be any references to the original sample site “Café Townsend”
Wednesday, April 18, 2007
Converting SWFs into a video format
Well, following the sign off my very large Captivate simulation projects (details to follow in the near future) I mentioned briefly back in February I’m finally back and excited to share some of stuff that has been happening over the last couple of months.
Today's post is all about a great new little application from Sothink.com called SWF to Video Converter. Using this powerful new application I am now able to convert Captivate content we create at work (WebAssist.com) into an AVI format. This is a very exciting development because it means that for the first time we can distribute / broadcast content on sites such as YouTube
I first came across the SWF Converter thanks to the Developer Center article Silke Fleischer wrote; Silke is a senior product marketing manager for Adobe Captivate. So naturally, being the inquisitive soul that I am, I naturally went and downloaded a copy of this software to put it through its paces and I have to say that I was very impressed. The wizard style user interface is very straight forward and what excited me the most was that this app could also record the audio from the current SWF file. I have to say that along with another very cool feature I’ll come to in a minute, this feature sold the SWF converter for me and I recommend that we should purchase this product. As whilst in the past I had experienced success in capturing Captivate screens using an AVI screen recording tool, capturing the audio at the same time had proved to be very problematic.
The other very cool thing about this application is that whilst you are playing and capturing your Flash (SWF) files using the Converter, you can still interact with your SWF file. This is made possible because the SWF Converter supports ActionScript which means that when you capture your SWF, the ActionScript can be played properly. So what benefit does this give you? Well, it means that using the SWF Converter you can capture all the steps from an interactive simulation (training or assessment in Adobe Captivate) and convert it into a video demonstration! You can view a small example of this by downloading this example file (2,112 KB) Sample Adobe Captivate interactive simulation converted into video format.
You also can see how we are now using the SWF Converter to market the Database Starter Kit on YouTube.com by clicking on the this link. Database Starter Kits on YouTube.com
Wednesday, February 14, 2007
A Quick Update
Things are pretty crazy here at the moment so posts are going to be far and few between for the next month or so. I want to apologize to any one who has recently posted comments that I have not replied to yet once things settled down I promise to get back to you all. Here are some of the things that have been going on.
- Speaking at the UK Learning Technologies Conference and presenting live demos for Adobe UK
- The launch of Project DB Cooper. DB Cooper is WebAssist's first commercial training package teaching Dreamweaver users (PHP and ASP) how to work with databases developed as interactive simulations. Learn more...
- UK Internet Magazine .Net feature WebAssist's SecurityAssist solution recipe on their cover CD of the .net February Edition
Sunday, January 14, 2007
Project: DB Cooper
Having just got back from my holiday break, I’m straight into creating Captivate content. One of the really exciting projects I am currently working on for WebAssist is a project which goes under the code name of “DB Cooper”. Unlike many of the other work projects I worked on last year, DB Cooper is an interactive simulation. Whilst I cannot go into the specifics of this particular piece of work, I must say that it feels great to be creating simulations again. There is just something about interactive simulations that really resonates with me;in particular the fact the interactive simulations enable learners to “exercise their mental muscles". Oh and if like me you haven't heard of DB Cooper before then visit this web address.
Adobe Captivate 2 includes a variety of new tools that make creating interactive simulations much easier that in previous versions these include:
- The Advanced Interaction dialog box
- The ability to automatically add text entry boxes for text fields
The fact that Captivate 2 will automatically insert text entry boxes during “capture time” is a good feature; though I have to be honest and say that I always find that I need to adjust any text entry boxes Captivate adds; plus, the program does not always capture the characters I have typed (during capture) correctly so there is still so additional steps to perform but at least now you have a better starting point than before.
However, the most exciting features for interactive projects are the Advanced Interaction dialog box. Historically, trying to recall the various settings you have applied to your interactive objects was a right royal pain as you had to inspection these individually. What the Advanced Interactive dialog brings to the table is the ability to review (and if required print) all your interactive project information from one centralized location. You can filter the list by clicking on the button that corresponds to the object type you want to review; one of things about the filtering I find particularly useful is the ability to remove any hidden slides from the list.
If like me you are spending much of your working life using this program then anything that improves you workflow and cuts down the overall duration of your Captivate projects is always something we will welcome with open arms.
Tuesday, December 19, 2006
Working with multiple pages documents
Sometimes when working on a Captivate project you might find that you need to include additional information which would normally be best presented in a multiple page text document. Although it is possible create a link to say an MS Word document using the Open URL or File option of a slide or interactive object such as a click box there are many instances where this is not the result you or your client is looking for.
So is it possible to embed a regular text document into an Adobe Captivate 2 project file. Well, if you want this to be an MS Word document, then the answer is No! The same is also true if you want to embed a PDF file. However, if you own Flash Paper then you can actually embed a document into a Captivate file.
Although you can just insert a Flash Paper document into a Captivate project an as animation; the problem here is that in many case you will find that the Flash Paper doc will get automatically resized when you preview and or publish the your project. To get around this annoying little Flash Paper quirk, carry out these steps.
- Create a Captivate project with a single slide and insert the FlashPaper (FP) document as an animation so that it covers the entire slide
- Make sure that both in the animation dialog and also the Project Preferences all transitions are switched off and that the loading screen option (Project preferences) is also disabled.
- Publish the FP document as a SWF
- Open the project file you want to add the FP document (SWF) into
- Insert the published SWF file containing the FP doc as an animation
- With the Animation options dialog on screen set the transition effect to No transition.
- Publish your new Captivate project
In the example I have included in this post, I've hidden a button object behind the FlashPaper SWF file to ensure that the slide is paused. In order to advance to the next slide you would simply need to click the Forward button on the playback control.
Learn more about FlashPaper
FlashPaper Developer Articles - Part of the Adobe Contribute Developers Centre. You may need to scroll down to locate these articles.
Monday, December 18, 2006
Publishing to an Adobe Connect Server
If you are using an Adobe Connect server, you might need to download this hot fix file that addresses a problem of Adobe Captivate 2 only supporting HTTP references.Hot Fix for Adobe Connect Server users
Read the tech note: Adobe Captivate 2 content uploaded to Adobe Connect fails to playback.
Read the tech note: Adobe Captivate 2 content uploaded to Adobe Connect fails to playback.
Thursday, November 30, 2006
Extending Captivate Projects with Variables - Pt2
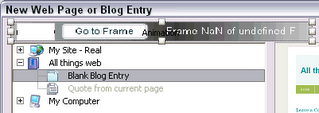
Today's post continues on the theme of working with Variables in Adobe Captivate but this time the sample file displays the current frame plus all of the SWF frames in the Captivate project and includes a go to frame feature.
The following commands were used to create this file:

The following commands were used to create this file:
- rdinfoCurrentFrame
- rdinfoFrameCount
- rdcmndGotoFrame
Friday, November 24, 2006
Macrofireball Logo
 Today sees the arrival of my new macrofireball logo. A number of people have asked me how the name "macrofireball" came about so here is why I choose that name.
macro - In memory of Macromedia Inc who first introduced me to Captivate. At the time the product was then still called RoboDemo and for those interested it was George Fox - Dev Center Editor for Dreamweaver who first told me about this incredible application.
fireball - because of the way Captivate was taken my career to a new level and given me opportunity to work on projects I could of only dreamed of.
ball - cos' it is round.
Subscribe to:
Comments (Atom)
