Showing posts with label Adobe Captivate 2. Show all posts

Wednesday, May 30, 2007

Dreamweaver CS3 Bible is alive


I am delighted to announce that the Dreamweaver CS3 Bible is now available. I created a series of interactive tutorials to accompany the book created of course with Adobe Captivate. When I get some spare time, I will post some of the techniques I used to create these tutorials. But for now it is back to the grind stone.

Tuesday, December 19, 2006

Working with multiple pages documents

Sometimes when working on a Captivate project you might find that you need to include additional information which would normally be best presented in a multiple page text document. Although it is possible create a link to say an MS Word document using the Open URL or File option of a slide or interactive object such as a click box there are many instances where this is not the result you or your client is looking for.

So is it possible to embed a regular text document into an Adobe Captivate 2 project file. Well, if you want this to be an MS Word document, then the answer is No! The same is also true if you want to embed a PDF file. However, if you own Flash Paper then you can actually embed a document into a Captivate file.

Although you can just insert a Flash Paper document into a Captivate project an as animation; the problem here is that in many case you will find that the Flash Paper doc will get automatically resized when you preview and or publish the your project. To get around this annoying little Flash Paper quirk, carry out these steps.

  1. Create a Captivate project with a single slide and insert the FlashPaper (FP) document as an animation so that it covers the entire slide
  2. Make sure that both in the animation dialog and also the Project Preferences all transitions are switched off and that the loading screen option (Project preferences) is also disabled.
  3. Publish the FP document as a SWF
  4. Open the project file you want to add the FP document (SWF) into
  5. Insert the published SWF file containing the FP doc as an animation
  6. With the Animation options dialog on screen set the transition effect to No transition.
  7. Publish your new Captivate project
View the sample file

In the example I have included in this post, I've hidden a button object behind the FlashPaper SWF file to ensure that the slide is paused. In order to advance to the next slide you would simply need to click the Forward button on the playback control.

Learn more about FlashPaper
FlashPaper Developer Articles - Part of the Adobe Contribute Developers Centre. You may need to scroll down to locate these articles.

Tuesday, November 21, 2006

Extending Captivate Projects with Variables - Pt1

Working for a company that develops software which integrates with Adobe software such as Dreamweaver, Adobe Connect and Contribute certainly made me wonder if there was any way of extending Adobe Captivate. Whilst Captivate does not include the ability install new components into the application the same way that you can with other Adobe products there are still ways using ActionScript code to communicate with Adobe Captivate and thus additional functionality. You can learn more about these in the Adobe Captivate 2 User Guide on pages 147 through to 148.

Before I go any further I would like to pause and offer my deepest thanks to my good friend Gaurav Satija who has kindly steered me through the murky waters of ActionScript. Gaurav your a pal!

To demonstrate this, let’s start with something very simple. Each of the Playback controls you add to your Captivate projects include an information box, not a lot of Captivate users tend to use and from what I gather even fewer end users ever bother to click on the Info button.

However, this still is a useful feature. This is especially true if you are creating section 508-compliant projects since project information such as the description can be read by a screen reader such as JAWs for Windows. Just as an aside the description is also useful if you are publishing to an Adobe Connect Server since content of this field is also used as your project summary.

To accomplish this all you would have to do is create a new Flash file with a small amount of ActionScript code that includes the following:
rdcmndInfo == 0 rdcmndInfo = 1

In plain English this means that if the Info box has an equality value of 0 or in other word is closed then set its value to 1 and open it.

You can see this in action by clicking on the graphic shown below

Ok, well that is all well and good, but now let’s move onto some a little more exciting.

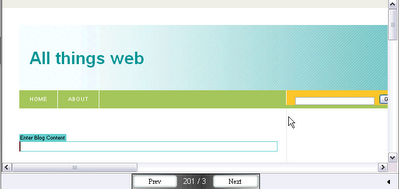
For example let’s say that whilst testing your Captivate projects you would like to display the current slide, the total number of slides in your project and a previous and next button to boot. Well, using the following four commands you can:

  • rdcmndPrevious – Go to Previous Slide
  • rdcmndNextSlide – Go to Next Slide
  • rdinfoCurrentSlide - Slide currently playing
  • rdinfoSlideCount – Number of slides in the project

To see this in action please click on the image shown below.
Now, if you are reading this and thinking well this is all well and good but I don’t know ActionScript code and I have no desire to learn either, well the good news is that for the most part you won’t have to. Adobe Community Expert Paul Dewhurst. has already created a ton of Captivate widgets that you can just download and then insert as animation objects into your Captivate projects. Many of these have been around since Captivate 1 but Paul has already started creating some new widgets that take advantage of the new features available in Captivate 2 including one widget that automatically opens closed captions. Something I will be using in my future audio blog posts.

Feel free to use this SWF file in your own projects. Simply download it. Insert it as an animation in your Captivate project and set it's display to Rest of slide.

Monday, November 20, 2006

Training Simulation Project

I'm still crafting out my next big posting so in the meantime here is a link to one of the big interactive simulation projects I worked on last year for Adobe (at the time Macromedia Inc)

Getting Started with Dreamweaver 8

All comments welcome.

Sunday, October 29, 2006

On Tour with Adobe UK

I’ve just finished the first leg of the Adobe Acrobat 8 Tour where I had the privilege of introducing attendees to Adobe Captivate 2 and demonstrate how Captivate fits in the Adobe Connect family. This first leg of the tour took place in London in Regents Park. As you can probably tell from my previous blog posts I love talking about Captivate and it is always a joy when I have the opportunity to introduce new users to the program; not to mention showing existing Captivate developers some of the many new features that Adobe have introduced in Captivate 2 not to mention showing how Captivate 2 can be integrated into the Adobe Connect (formerly Macromedia Breeze) workflow.

The next leg of the tour takes me to Leeds on November 9 followed by Manchester 28 November so for those who are registered for those dates I look forward to seeing you there.

Without this sounding like the award ceremony at the Oscars I do want to take this opportunity to also thank all those who attended my sessions in Regents Park and to Adobe UK for making me feel so welcome. I look forward to catching up with you again later this month.

Wednesday, September 20, 2006

Transparent Text Captions

Today’s Adobe Captivate 2 feature is transparent text captions. Transparent text captions, I hear you say! What possibly could be so exciting about these? Well in Adobe Captivate 2 if you need to create a transparent text caption and you want your text color to be say white, the Text Captions dialog box temporarily fills the background with a color so that you can see what you are typing! How much do I love this feature? More than words can say!

Transparent Text Captions

Tuesday, September 19, 2006

Preview Next X Slides

Project Preferences

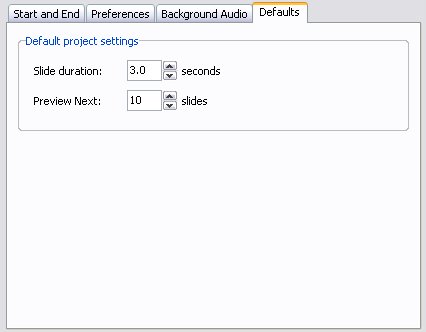
Today’s Adobe Captivate 2 feature focuses on Previewing. When working on a project there as many instances when you only want to preview a certain amount of slides; although with Captivate 1.x you could preview the next five slides, there were many occasions when this simply wasn’t enough.

To address this issue in Adobe Captivate 2 you the user can now specify how many next slides the program should preview.

Another option in this dialog, is the ability to specify the default duration for newly created blank, image and question slides.